Learn to make your own website and get it online.
The Website.com Website Builder is the most user-friendly platform to make and publish an entire website online.
This guide will show you how to navigate and use the Website Builder to create your online presence.
Congrats! You've created your Website.com account and you're ready to build your website.
Our website builder is designed so you can create your entire website in the easiest way possible. Note that you can even use the Website.com website builder to make your whole website using a smartphone, but this this guide will show you how to make a website on a desktop computer or laptop (although the process is quite similar).
As the saying goes, "the first step is always the hardest" and it's no different when building a website. Website.com makes it easy to take the first step to making your professional online presence.
Once you've signed up for a Website.com account, click Edit Site to go to the website builder. Your template is a layout with sections and dummy content. You're ready to start customizing your website now!
The website builder is where you will be creating and editing your website.
The main area -- or the canvas -- is the working area of your website. This is where you'll see your website header, website body, and website footer. Your entire website body layout is made up of sections, and within the sections are the website items.
You can change the overall color theme and font packs for your website. Click Site Design on the left side of the website builder to access the Design functions.
Fonts
The fonts for your text elements are linked to a font pack, or font pairing, by default. Any changes you make here will be applied to all text that is linked to that font style in order to achieve a consistency style across your website.
Colors
Like font packs, the colors for your entire website are linked to a color theme by default. You can drastically change the look and feel of your website by changing to a different color theme.
Buttons
Choose a consistent button design style that will apply for all of your website buttons. Select the button size and button border radius.
Sections contain website elements, like images, text and media, to make up your website page layout. You can customize sections with your own content.
Section Mini Toolbar
When you click on any section, you'll find these functions in the section toolbar located on the top right of the section.
Design
Click the "Change Section Design" icon to change your section's layout, color, or other aspects of the design.
Clone
Click the Clone icon to create an identical section that will be added below the existing section.
Move Up and Down
Click the Move Up or Move Down arrow to move your section up the page.
Hide Section
By clicking the Hide icon, the section wil nlot be visible on the website builder, nor on your published website. If you choose to Unhide Section, you will be make it visible on the page again.
Delete
To remove a section from your website page, just click the garbage can icon.
Add Sections
To add a new section, hover on a section on your website page. Click + Add Section that will appear at the bottom of your existing section. Choose a section category and section layout to add it to the page. The new section will be added below the existing section.
Remove Sections
To remove a section on your website page, hover on the section, and click on the garbage can icon on the top right corner.
Section or Element Left Panel
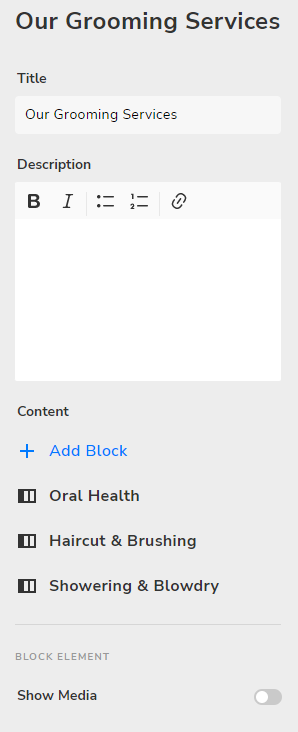
When you click on a section or website element, you may see functions that are specific to each section or website item on the left side of the website builder.
Item Specific Mini Toolbar
Click on a website item within a section, and you'll see functions specific to the website element right above the element.
Customize Text
Simply click on any text within the layout to customize the text.
Customize Image, Videos or Media
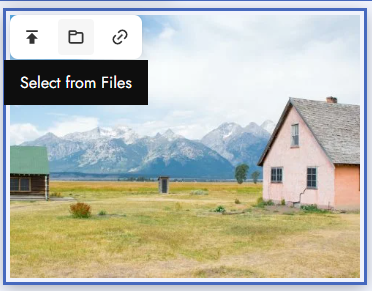
Click on any image or media within the website layout, and click the folder icon. Choose from your own uploaded files, or select an image from Stock Images or Stock Videos under Explore.
The header is the very top section of your website. A website header typically includes the website name and/or logo, website menu, social media links and a call to action button.
Header Design
Easily choose the header background color from your color theme.
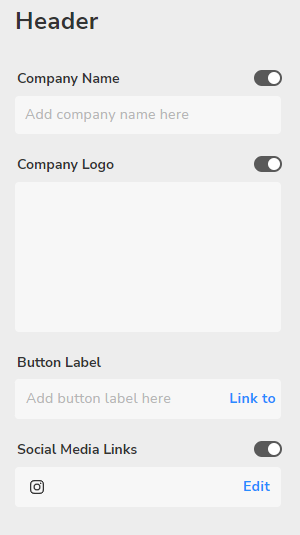
Company Name
Add your website title or company title beside your logo to complete your branding. If you do not want to show a website title, just toggle this off.
Company Logo or Header Image
Upload your own business logo to complete your website branding.
Site Menu
You can rearrange your website menu order or change the page titles under Pages.
Button
Add a call to action for your website by changing the Button label and adding a link URL.
Social Media Links
Link your social media accounts so that visitors can easily connect with you. If you do not want to show any social links, simply toggle Social Links off.
The footer is the very bottom section of your website. A website footer typically includes contact details, quick links and a call to action button.
Footer Design
Easily choose the footer background color from your color theme.
Logo or Footer Image
Upload your own business logo to complete your website branding.
Contact
Contact Address, Phone and Email
Add relevant contact details for your business so that visitors can contact you easier. Contact details also add legitimacy to your website and business.
Social Links
Link your social media accounts so that visitors can easily connect with you.
This is where you can manage the image, audio, video and other document files that you've uploaded.
The page management function in the website builder gives you complete control over your pages. Not only does it let you add and remove pages, it also allows you to rearrange your site menu and set up your meta title and meta descriptions.
You can access the page management function by clicking on Website Pages.
Add New Web Pages
You can add additional web pages to your website by clicking Manage Pages in the dashboard on the left, and then click + Add Page.
Navigate to a Different Page
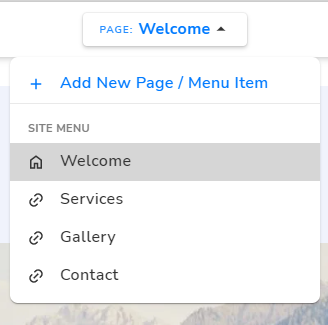
You can jump to a different web page and work on it by clicking on the page name from the list under Site Pages, or using the dropdown at the top of the editor.
Delete Pages
You can delete unwanted pages by clicking on the Settings icon beside the page name in the list under Site Pages, and clicking Delete. Deleting the page will also remove it from the site menu.
Rearrange Website Menu Links
Your website menu allows visitors to navigate through different pages on your website. You can edit the order of your pages on your website menu by clicking on Website Pages. Under Site Menu, you'll see the list of website pages. Just click and drag on the dots beside a page name to rearrange its order on your site menu.
In the Site Pages area, you can edit your page settings. The page settings are found by clicking the gear icon that's to the right of the page name.
The settings are split into four categories: General, SEO, Social Sharing and Custom Code.
General
Page Title
You can change the name for your page here. This page name will be used to reference this page in the website builder, and will be the page title displayed in the site menu.
Page URL
The Page URL will be the website address for the website page.
Visibility
Public
Your page will be able to be viewed by all online.
Offline
If you choose to make your page Offline, it will be disabled and will become unreachable by the public.
Set Page as As Coming Soon
Choose this option if you want to temporarily hide a page as you make internal changes to your web page. On the published side, visitors will see a Coming Soon page.
SEO
Search Results Preview
See what your SEO Title and Description will look like in search results.
SEO Title and SEO Description
Add a meta title and meta description for your page, which will be displayed in search engine results. A page title and page description can improve your search rankings by letting search engines know what your content is about.
Learn more about meta tags and SEO
Let Search Engines Index This Page
Keep this toggled on in order to allow search engines to crawl your page content.
Social Sharing
Upload an image to be displayed as the preview for your website page. The preview will appear when your web page URL is shared on social media.
Custom Code
Header and Body Code
If you're using any 3rd party scripts or conversion tracking services (like Google Analytics or Google Adwords) and you need to add custom code to your page, you can do it here.
Saving Your Work
The website builder will automatically save your work so you don't need to worry. To see the Site History of saved versions of your website, you can go to Site Settings > Site History.
Previewing Your Website
You can view a preview of your published website by clicking Preview in the top right.
Desktop Preview
See a preview of how your website will look like when visitors look at your website on a laptop or computer.
Tablet Preview
All websites built with the Website.com website builder are responsive. This means your design will automatically be optimized for tablet view! Just click the tablet icon to see what your website will look like when viewed on a tablet.
Mobile Preview
Your website is responsive, and will be automatically optimized for viewing on a smartphone. You can click the Mobile icon to preview what your website will look like when visitors view your website on a smartphone.
Publishing Your Website
Once you've built your site or you're done making changes, you will need to publish your website in order for the changes to go live.
To publish your website, click Publish at the top right of the website builder.
That's all it takes! Your website is now online.