How to Create a Small Business Website
Get your business website online with our simple and easy-to-follow guide.
The Website.com Website Builder offers a slew of features, tools, widgets, and more to help you get your business website off the ground.
This guide will show you how to navigate and use the Website.com Website Builder to create a business website.
Congratulations! You've created your Website.com account and you're now ready to build your business website.
Our website builder is designed to let you get your website online in just 3 simple steps:
Choose your template
Customize your content
Publish your website
- 1Choose Your Template
Before you get started with the website building process, we recommend that you prepare all the content you plan to include on your business website beforehand. This includes pieces of text, photos, files, videos, and anything else you'll want to eventually include on your website.
This will let you have a better idea of how to implement different content onto your website as you're building it.
Getting started might feel difficult, which is why we've crafted hundreds of unique and beautiful website templates to get you off to a running start! Particularly for business websites, we offer dozens of templates tailor-made for any business to use! All you need to do to find them is to enter "business" into the template search bar.
While you do have the option of building your website from scratch, we don't recommend doing so unless you're experienced with web design.
To choose a website template for your website:
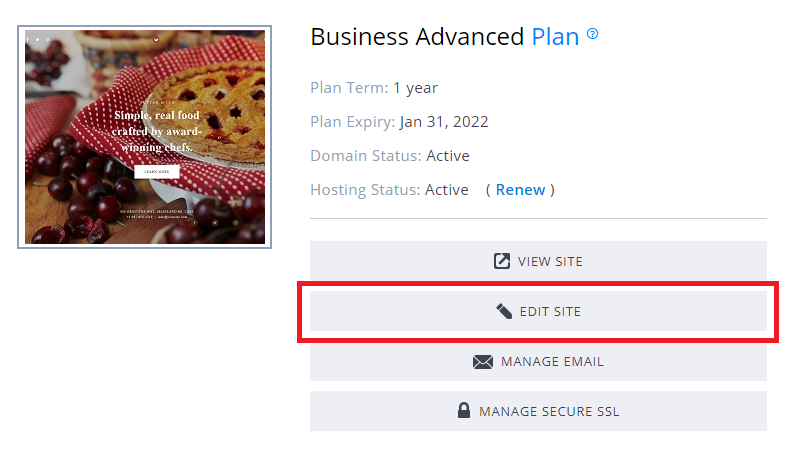
Log into Website.com and click the Edit Site button. This will take you into the Website Builder.
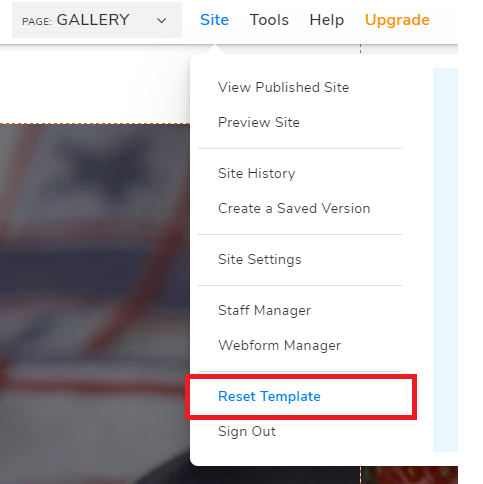
Click Site in the top toolbar, then click Reset Template.
Browse through the wide selection of available templates. Once you've found a template you want to use, hover your mouse cursor over it and click Select.
Click Ok and then Continue to confirm your template selection.

- 2Tips for Choosing Your Template
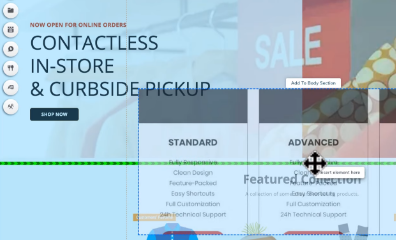
Because our templates are fully customizable, you have the freedom to change everything you see in a template to suit your own needs. Everything from content and styling to layout and fonts are yours to customize.
When you're considering what template to use, focus on choosing a layout you'd like to use, rather than just a template's images and colors.
When you've decided on a layout you like, all that's left for you to do is replace the dummy text and images with your own custom content.
The website builder is where you'll be doing all the creating and editing for your website. That's why it's important to know how you can best use the website builder to create your own beautiful site.
The main area, what we can refer to as your canvas, is your working area for your website. This is where you can move page elements around, edit text, and make any changes you'd like to for your web page. The toolbar is at the top of the page. Page design features and app page management features are to the left of the page.
- 1Toolbar
Read on to get a quick helpful summary of the toolbar's functions.
Undo and Redo
These functions can be used to undo or redo any changes that you make to your canvas. Changing pages or ending your session will reset your undo and redo, so make sure you're satisfied with what you have before you navigate away.
Copy and Paste
This function lets you copy and paste elements between pages on your website. To copy and paste elements:
Select the element you want to copy by left-clicking it. If you want to copy multiple elements, you can select them by holding the CTRL key on your keyboard, then left-clicking the individual elements you want to select.
Copy the selected elements by clicking the Copy icon, or by pressing CTRL + C On your keyboard.
Paste the elements by clicking the Paste icon, or by pressing CTRL + P on your keyboard.
Delete
This function will delete the selected elements from your canvas. Simply select what you want to remove, then click the Delete icon.
Change Layer Order
This shows you which elements are stacked on top of or beneath a selected element. The crosshair icon indicates the element currently selected. You can drag the currently selected element up and down the list to change how it's layered with relation to the other elements in the stack.
- 2Design Functions
All website design functions are located to the left of your canvas.
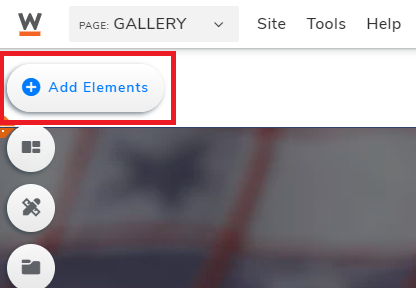
Add
Use this to add different elements like text, images, and more to your website. Click the element type to see a list of preset styles, then drag the style you want onto the canvas. When you drag the new element onto the canvas below another element, you'll notice a green line appear. This green line indicates that when you drop the element, the elements below the green line will move down to create space for the newly-added element. If you would rather have the element overlap with another element, be sure to drop the element on another element when you don't see a green line appear.
Here are some step-by-step instructions on how to add popular elements to your website:
Text can be added, edited, and/or removed depending on how you'd like your site's layout to look.
Add images, videos and audio to introduce variety to your business website, and effectively draw in the attention of your visitors with a variety of content types.
Add and edit buttons, social media widgets, forms for your visitors to fill out, to better engage with your site visitors. For buttons, you can have them link to features such as PDFs of documents or other websites your visitors would find useful. For social widgets, you can use them to link to your presence on different social media platforms. For visitor forms, you can let them help your visitors get in contact with you, sign up for newsletters from your business, and more.
You also have the option of implementing custom code onto your business website, which you can achieve with just a few clicks and your code at the ready. Anything from Google Calendar features to OpenTable Reservation availability can be implemented on your Website.com Website Builder site.
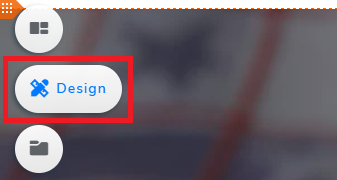
Design
This is where you can change the overall color palette and font styles of your website.
Color Palettes
Your website elements' colors are linked to a color palette by default. You can change your site to an entirely different color palette to dramatically alter the look and feel of your website to your visitors. Be sure to choose a color palette that suits the professional feeling your business website should have.
Font Styles
Just like color schemes, the fonts for your website's text elements are linked to a font style by default. Any changes you make here will be applied to all text linked to that font style. Font styles can go a long way in making your site look professional and presentable.
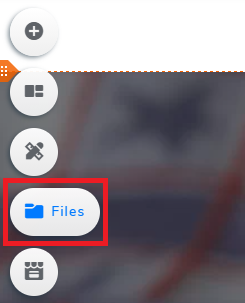
File Manager
This is where you can manage the images, audio, video, and other document files that you've uploaded to be used on your site. This can be a great spot to check out what you can still add to your business website, whether you should look for any new or better files to use, or to keep track of your progress in constructing your business website.
Saving Your Work
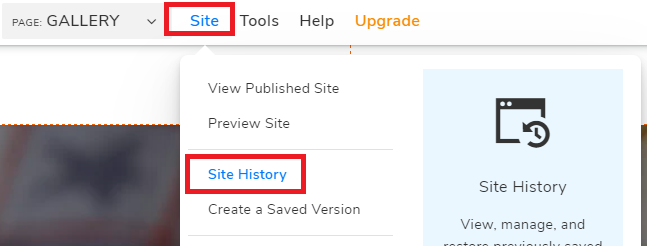
The website builder automatically saves your work after every edit and addition you make, so there's no need to worry about losing your progress when building your site. To take a look at the Site History of your website's saved past versions, you can go to Site in the top menu bar, then click the Site History button.


With the page management function available in the website builder, you gain near-complete control over your pages. Along with letting you freely add and remove pages, you can also rearrange your site menu and set up your site's meta tags, which can be of great help to business websites' success.
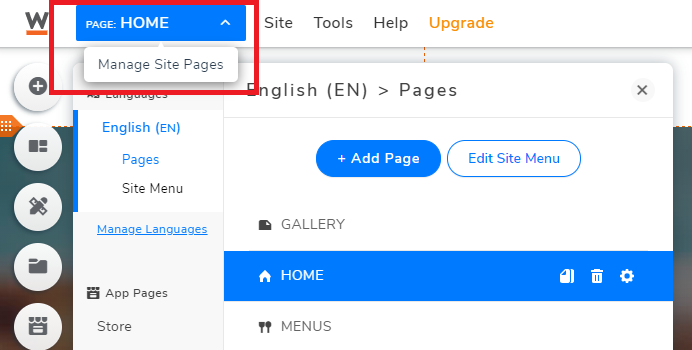
Access the page management function by clicking on the page name drop-down menu in the toolbar. If you're on your home page, for example, you'll see "PAGE: HOME" as the clickable button that lets you access your page management function.
- 1Pages
Add new web pages
You can add additional web pages to your website by clicking Add Page.
Navigate to a different page
You can jump between different pages to complete work on them by clicking on the page's name from the page management function's list.
Delete pages
You can delete unwanted pages by hovering on the page name, then clicking the Garbage Can Icon that appears to the right of the page name. Deleting the page will remove it from the site menu as well.
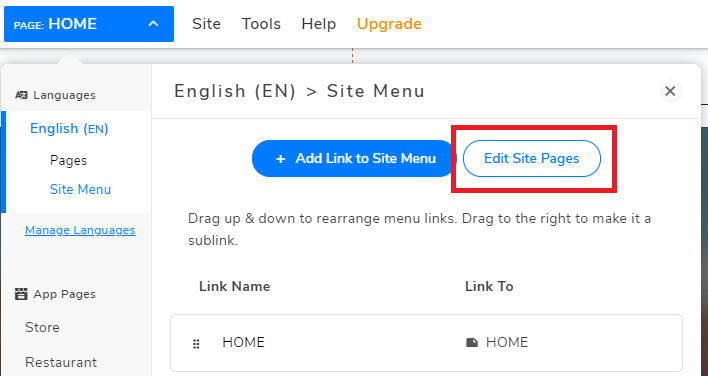
- 2Website menu
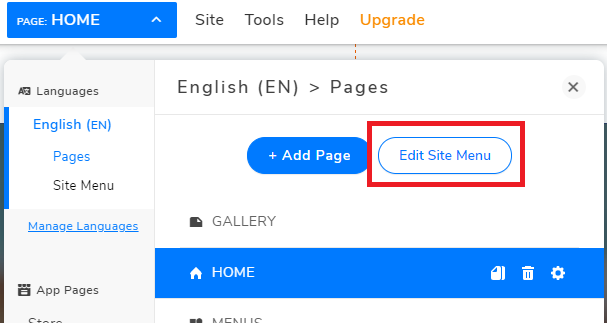
You can edit your business website menu by opening the Pages dropdown, then clicking the Edit Site Menu button.
Rearrange your site menu
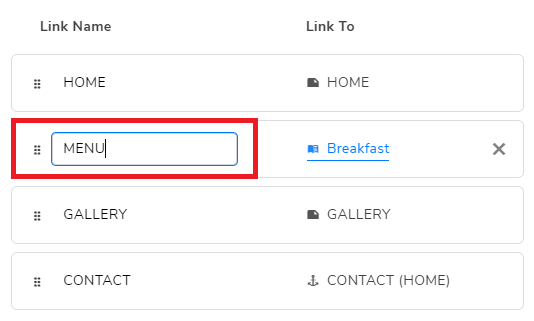
To rearrange the order of your site menu items, click and drag the dotted rectangle to the left of the link name.
Set a page as a subpage
You can set a page as a subpage of another page by clicking and dragging the dotted rectangle below that page and to the right.
Change Site Menu Page Links
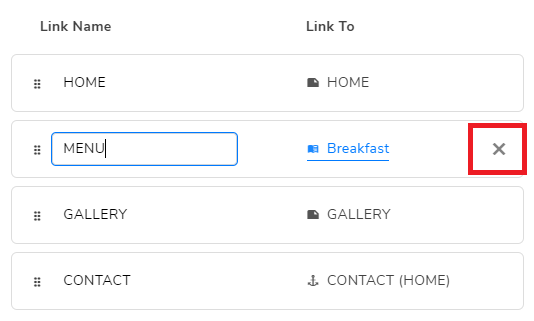
To edit the name of the web page link in the site menu, click Edit Site Menu and change the Link Name in the Link Name field.
Remove menu links
Remove unwanted links from the site menu by hovering on the link name and clicking the X Icon that appears to the right of the page name. Removing the site menu link won't remove or delete the page, but it will remove the site menu link from appearing in the menu. The web page will still be active and visitors can still access the page by going to its URL. You can use this feature to, for example, create pages that not all your site visitors would know to access unless they found your business site from a certain location or link.
- 3Page Settings and Properties
In the Pages dropdown, you can edit your page settings. If you're editing the Site Menu, you can still manage site pages by clicking the Edit Site Pages button.
To find the page settings and properties of a page, click the gear icon to the right of a page name.
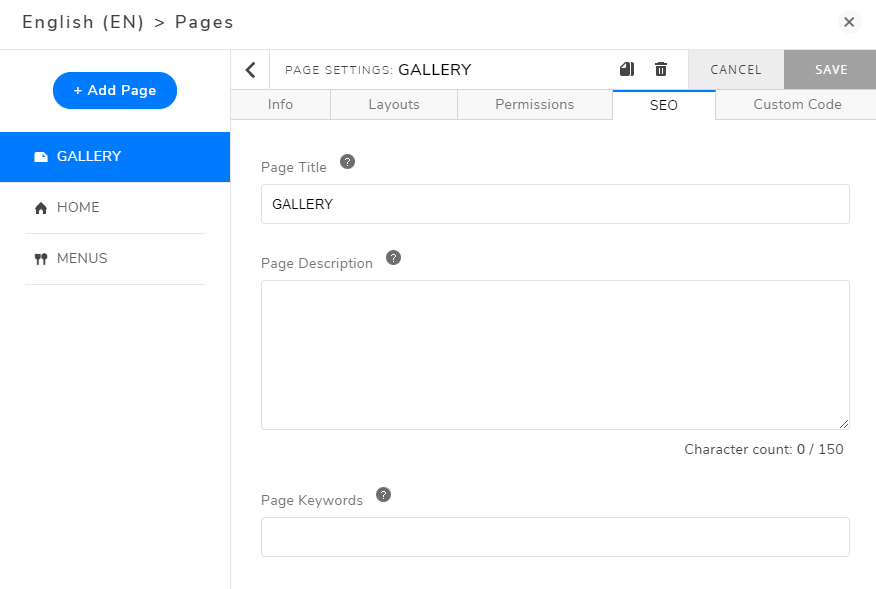
You'll find that the settings are split into five categories: Info, Layouts, Permissions, SEO, and Custom Code.
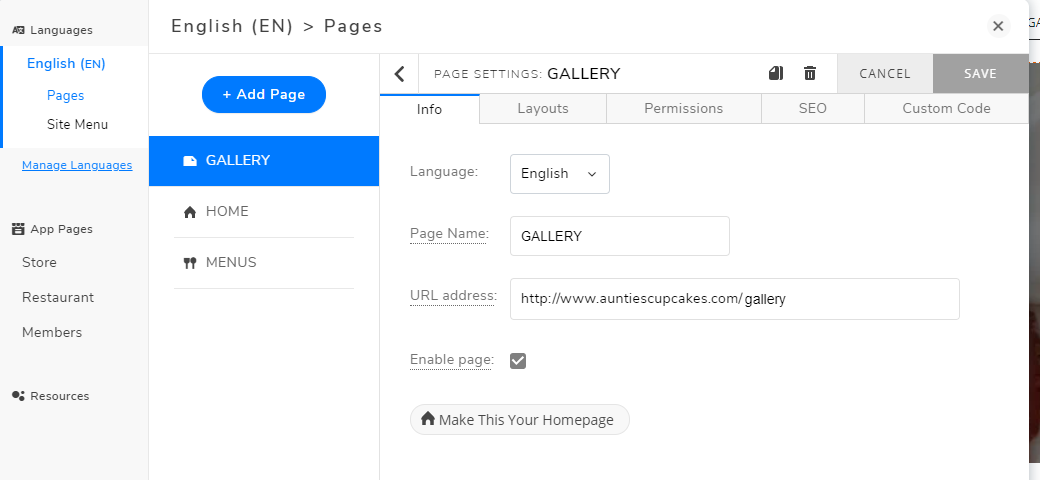
Info
Language
You can set your page language through this dropdown. Put this function to use by, for example, creating multilingual pages to appeal to different demographics that would be interested in your business.
Page Name
Here, you can change the name for a page. This page name will be used to reference this page throughout the website builder. Note that changing your page name won't automatically change the name of the page link that appears on your site menu, so you'll need to edit the name of the page link as well. To edit the page name that appears on your website menu, click the Edit Site Menu button and change the link name for that page.
URL Address
This is the URL, or web address, for the web page. By default, this will be set to your page name in lowercases, with any space being replaced by dashes.
Make a Page Your Homepage
Selecting "Make This Your Homepage" will set your web page as the homepage of your website. This means it'll become the default page your visitors land on when the go to your domain name. Keep in mind that a website can only have one homepage, so pick a page that does a good job of representing your business to visitors and encourages them to become interested in what you have to offer.
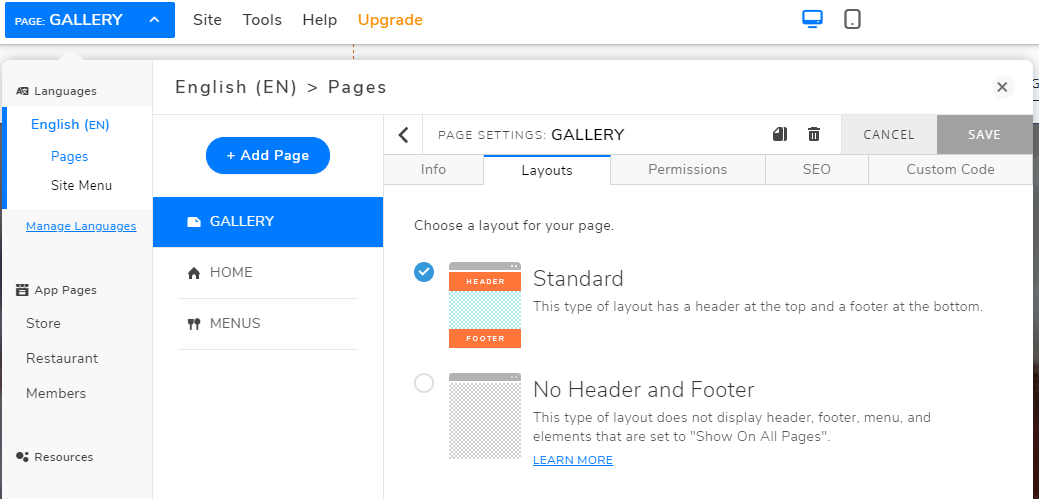
Layouts
Standard Web Page Layout
The standard layout has a header at the top and a footer at the bottom.
No Header and Footer Layout
You can hide the header and footer from your entire website with this option.
Permissions
All Visitors
Selecting All Visitors will allow anyone who visits your site to access your published web page.
Password Holders
Selecting Password Holders will restrict public access to this web page. You can set a password for your web page, so that only site visitors with the password will be able to view the contents of your web page. You could use this feature to, for example, offer special deals for your business that only those who've seen the password before can access.
All Members
Selecting All Members will restrict access to this page to all Site Members and Store Customer Members. Only members will be able to view your web page when they log in. You can add and manage Members on the left of the interface.
Selected Member Groups
Choosing Selected Member Groups will restrict page access to selected Site Members and Store Customer Members, based on your Member groups. Only selected member groups will be able to view your web page when they log in. You can add and manage Member Groups under Members on the list.
Selected Members
Choosing Selected Members will restrict page access to a single Member.
SEO
Page Title, Description, Keywords
These are meta tags that are used by search engines to locate and categorize pages relevant to their users' searches.
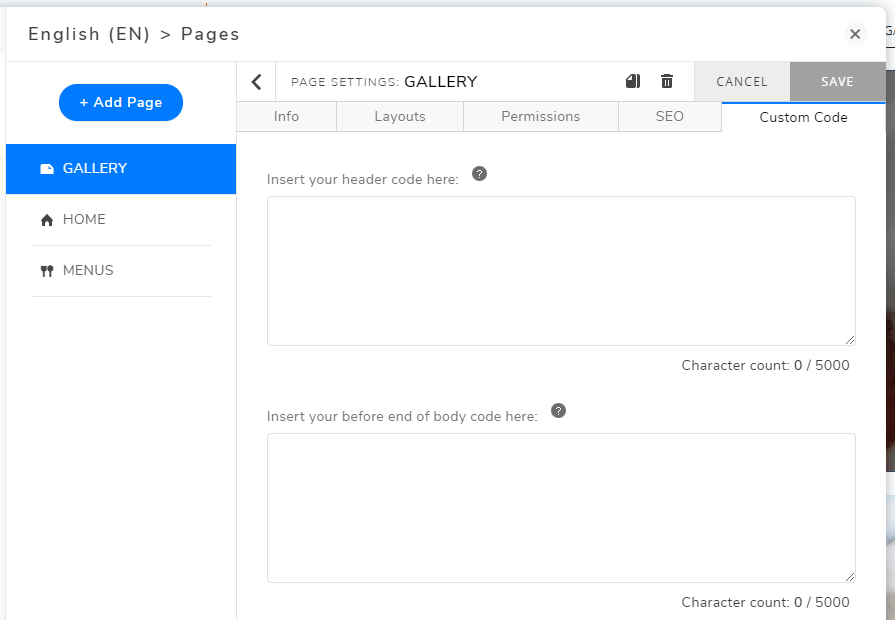
Custom Code
Header and Body Code
If you're using any 3rd party scripts or conversion tracking services, such as Google Analytics or Google Adwords, you'll need to add custom code to your page to make them work. Come to this section to add your custom code.


Once you've built your site or are done making changes, you'll need to publish your site in order for the changes to go live for visitors to see.
To publish your website, click Publish in the top right of the website builder.
You'll see a list of your website pages. Choose the pages of your site that you'd like to publish, and choose whether their mobile versions should be published too.

